Showing posts with label Craft-Dee BowZ. Show all posts

Tuesday, October 1, 2013

Pretty little Poinsettia

Okay, some of you may be saying it's a little early for Christmas -- we haven't even had Halloween yet!  Well I have been doing Christmas projects for over 2 months now -- mainly because of my teaching schedule at the store and on the road with Craft-Dee BowZ.  But I was in Texas this past weekend with The Collins Group and we did this sweet little project with Susan's Garden and I thought I'd share it with you.


It got mangled in my suitcase on the way home, but I was able to spruce it back up.  Isn't this the cutest?  The box is made from a  Sizzix die (unknown) and the poinsettia, of course, is from Susan's Garden.  Just love her stuff.  I used to make a lot of her creations when she was affilliated with The Punch Bunch.  But using dies is soooo much easier as you can get several different sizes and store it in a smaller space (than punches).  We also used a combination of Elizabeth Designs wide tape and her wonderful glitter.  This was the last class I took at the trade show and it was the MOST relaxing class I have ever been in!  Just thought I'd share.

Ciao for now!

Ciao Bella! 

Tuesday, March 5, 2013

Window dies

Did you know that a window die can be rather flexible in how you use it?  I had the opportunity to teach a class recently using the Spellbinders Die D-Lites Window One.


I started with a card using this adorable die in the traditional fashion below:


This card is pretty straightforward - I used an embossing folder for the green layer, then pop dotted the window on top and punched some tiny flowers and leaves and added them as a window box element.

This next card combined the following dies:  several Spellbinders scalloped squares,  Sizzix flourish and leaf dies,  an MFT rose die,  the window die, and some Cheery Lynn corner dies for accent.  By cutting the bottoms off the window dies and placing them on a square card, this is the effect you achieve.  I know there's alot going on here, but this card just kept calling for more!  I did use two different embossing folders as well on the square layers.  And to top the whole effect off, I made a multiple loop bow using the Craft-Dee BowZ.  You might want to check out the Craft-Dee BowZ website as I have my Design Team post something new every week.  We will also be sponsoring another blog hop next month for your viewing pleasure - something light and spring-y!


Well I hope I've inspired you to use some of your dies in a non-traditional way.  I'm a firm believer of making my dies do more work for me a/k/a "more bang for your buck".

I'd love to hear what you think of these projects, so drop me a line, won't you?

Ciao for now!

Ciao Bella! 


Monday, June 18, 2012

Washi, Washi, Washi...

...as in Tape, that is (some call it Trendy Tape and a few other names).  I love this stuff -- tried it yet?  Here are a few ideas for your for card making:


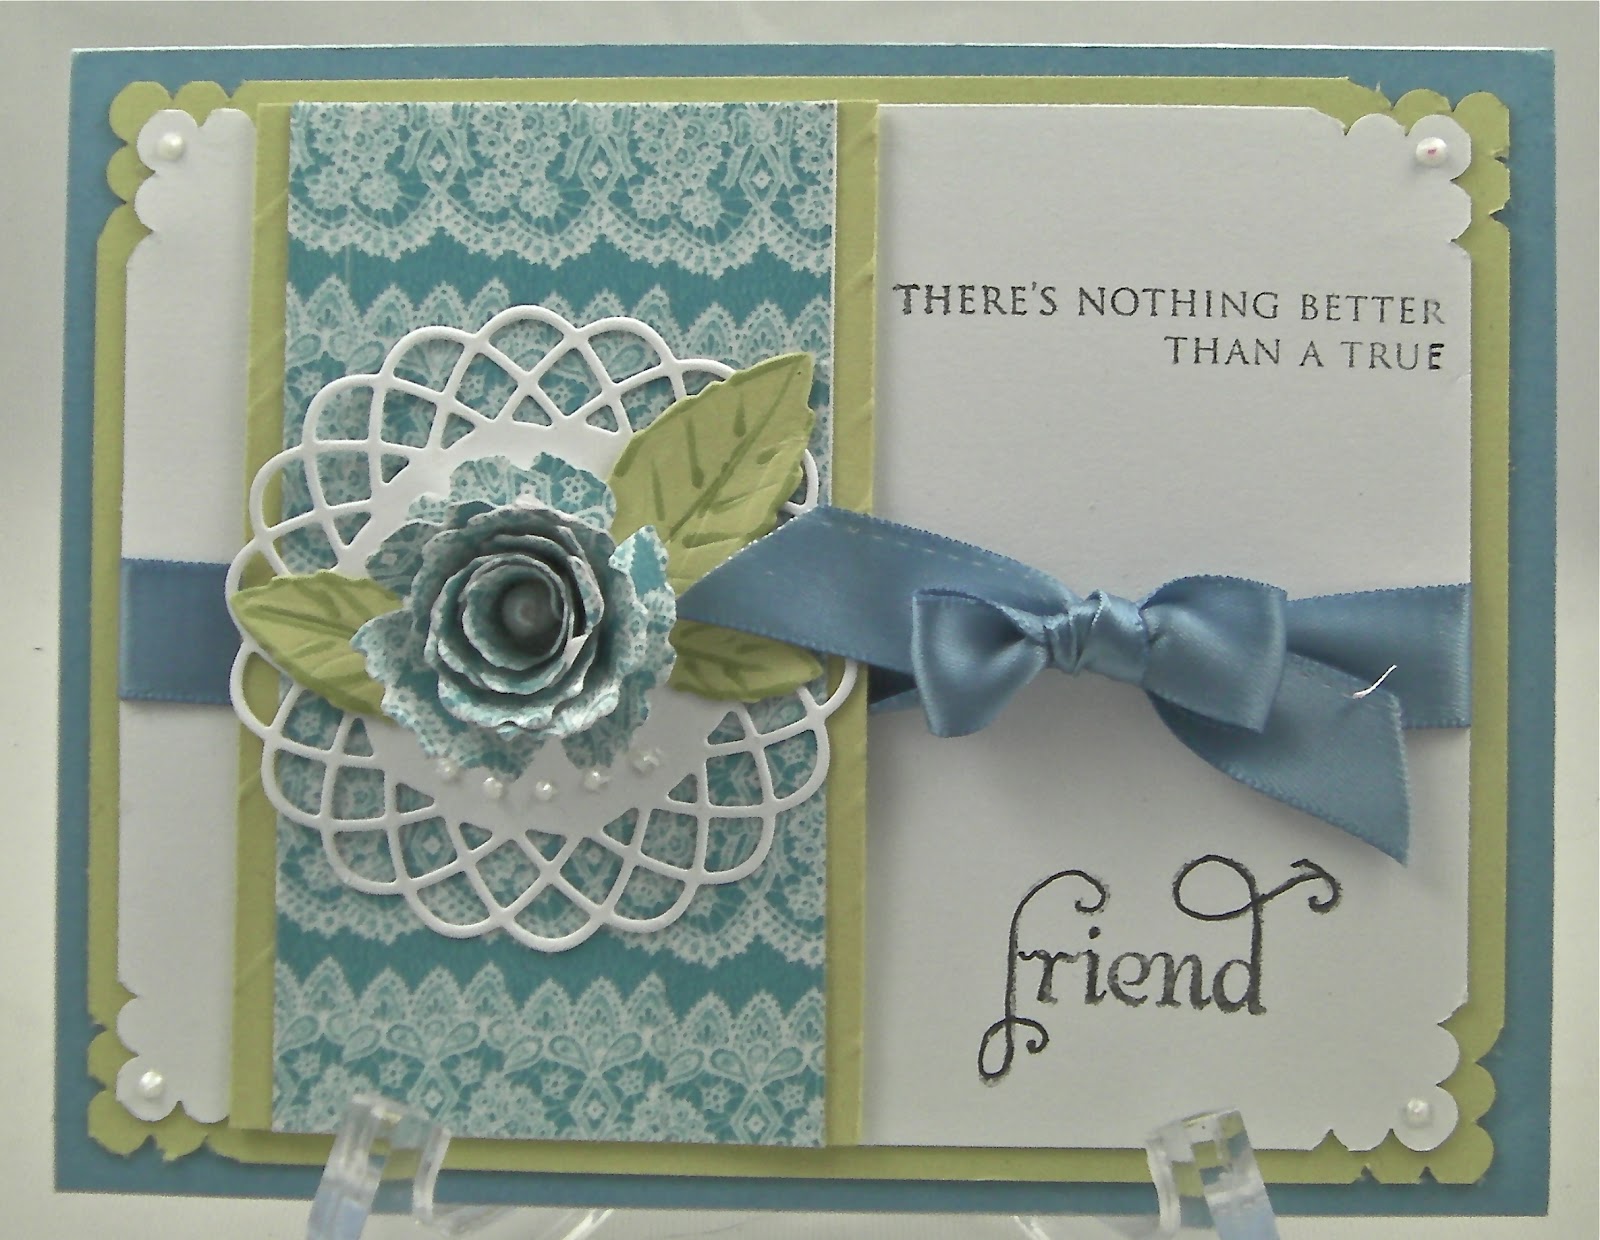
This first one is a lace pattern that I just love -- or maybe because it's blue, or maybe for no reason at all!  I just butted the pieces of tape against each other to form this lovely background.  THEN, I placed a few pieces on a piece of card stock big enough to accommodate my flower die (by MFT) and die cut and curled it.  Oh boy!  Another world just opened up!


This second one I used a combination of Washi Tape and Ribbon and a technique that Judikins did years ago.  I also repeated the flowers again.

While the brain was whirling in a mud puddle of happiness, I thought "I wonder if I can make a bow with my Craft-Dee BowZ using Washi Tape?"  You be the judge -- I had so much fun creating this little tin!  


I figured it out!  I ran different lengths of Washi along a white plastic supermarket bag, then trimmed the excess bag away (it zips along - get your scissors in the right position and whee!  it's done!).  This gave it some stability plus something to stick to.  You can't use card stock - it's way to stiff to tie a bow.   I added in a few more die cuts - you know me!  Queen & Co. is supposed to be sending me a box of their tapes to "play" with.  I guess I know what I'll be doing for a few weeks!  Well, probably after CHA anyway. 

Well, that's it for now.  Talk to me -- let me know what you think!

Ciao Bella!


Wednesday, January 18, 2012

Coming up!

Well, I can see it's been a while since I posted (yet again!).  Things have been hectic in the Ciao Bella kingdom of late.  So much going on, so little time to do it.  Let me catch you up on a few notable things.

First, you all know that I am the inventor and owner of the E-Z BowZ bow making tool.  Well that little kingdom got turned on it's head back in November when my Trademark got challenged by someone with deep pockets.  Long story short, it was just easier for me to change the name of my sweet little tool.  More info to come on that (passt!  the new name will become Craft-Dee BowZ).  I just need to get my videos up and running before I can reestablish a new blog .  But I am moving forward with a light step knowing that something good is round the corner in light of this blight on my holidays.  So stay tuned for the new announcement!

Secondly, classes have been going great at the Whitman Community Center since we started after the holidays.  Being out of my teacher "harness" felt surreal, but I'm baaack!  Here's another class coming up in February at the Community Center (I already showed you the January classes in an earlier post) -- you can get all the deets at KD Crafty Concepts if you'd like to sign up.  


Thirdly, I am really jamming the keyboards to A.) get my new blog up and running and B.) putting some slideshows together for a bow related marathon being offered by My Creative Classroom in February.  Gotta start now -- time has a way of getting away.

Fourth, I've been busy putting classes together for The Crop Shop in Rockland as well. Here's one coming up on January 25th.  Call to sign up!  We'll be using Memory Box Dies and you all know what a "die junkie" I am!


And the last big thing I've been working on is creating an event to bring to Cape Cod.  We realized there was a huge void down there with the closing of Colorful Creations last year.  People have to travel great distances to avail themselves of cropping and card making classes.  So I made a proposal to the owner of The Crop Shop and we are taking the store on the road the first Sunday of every month (except June thru August) and the first event will start on Sunday, February 5th.  The ad will be going into The Register in the Yarmouth/Dennis/Barnstable County area tomorrow.  So, if you're in that area, be sure and pass the word on to your friends.  We'll be doing a Round Robin Card Making/Project Making Marathon.  You can call The Crop Shop for deets on this as well -- and, by the way, there's a special surprise for the first 10 who sign up!  I'm really excited about this event, more so because it's my "baby" and I want it to be a huge success.

Well that's it -- ciao for now!

Ciao Bella!


Tuesday, September 13, 2011

The Last Hurrah...

Well, it's been a roller coaster ride this past week with 5 classes in as many days.  I am plumb tired.  I have one more class this week at the Scrapbook Cupboard (it's full as they all have been) and my LAST class forever at the store will be next Monday (big sad sigh!).  Since I just got the product to work with, I had to throw something together really fast in order to advertise this class.

The product I'm using is a new set of heart dies from Cheery Lynn Designs and it was worth the wait.  I just wish I'd had more time to put something together and not be rushed.  I really have lots of ideas for these dies, but time has been my enemy with all these classes and late product arrival.  So, without further ado, here are the two cards I put together.  How fitting that they are hearts as my heart will miss my students in a very big way.  We've had 8 years together and have had more fun than I can ever tell you.

This first card is a cupboard fold (how appropriate) to which I added some designer panels to jazz it up and then edged them using a gold leaf pen.  I then put a very different twist on the smallest of the heart dies and created this flower and decided to push it toward the holiday look.  The large white heart is the largest of the dies and after cutting it out, I ran it through a holly leaf embossing folder and edged it in gold leaf.  Next was die cutting the hearts for the petals and constructing it in a flower shape.  It went a lot faster than I thought.  A few die cut holly leaves, a little glitter and it was done!


The second card was based solely on this beautiful designer paper.  It just begged me to use it.  So I constructed this card using the various dies in the set.  I knew I wanted to use silver mirror paper, but gee, I seem to have run out of it.  What do to?  Aha!  Go grab the tin foil, glue it to a piece of cardstock and die cut the heart.  It worked great and continued the inspiration for the remainder of the card.  I topped the entire image off with a triple-loop silver bow made with my E-Z BowZ of course!


Well, if you haven't signed up for this class, you'd better pick up the phone!  It's bound to be a full and fun last night for me and my students.  

That's it for now -- all but the crying part, that is.  Ciao for now!

Ciao Bella!


Sunday, August 21, 2011

M'Lady's Slipper

Hi Ciao Bella followers!  Wow!  I don't know where I've been this past month, but I hope I had fun wherever it was!  I can't believe it's been this long since I've posted anything.  I must have been busy (and I hope I figure out what it was.).  So, my apologies to m'ladies and here's a set of cards to go along with that apology.

We've been using quite a bit of the micro fine glitter at the store and I had to run a few more of these classes to keep people happy.  Not that it was a drudge -- believe me, I loooove working with this product by Elizabeth Crafts.  It's the smoooooothest, finest glitter anywhere.  There's a certain technique involved when doing these cards and it involves very wide tape, transfer tape, peel-offs and, of course, glitter.  Here's a look at both the cards:


For those of you who are not familiar with this technique, it's called Burnished Velvet.  I always get a kick out of my students when they start to burnish the glitter and you always get the same reaction:  "oooh!  look at that sparkle!".  While it's a bit time consuming to do the larger image, it's still a really fun project to do because it's like a puzzle revealing itself one piece at a time, but unlike a puzzle, you have complete control over what goes where.  It is such a fun techique!  The purple card was done using one of the smaller images in the peel-off package.  Here I used a square scalloped (Spellbinders) backing to show it off and I used the same technique using my wide tape and the Glitter Ritz glitter.  It was topped off with a lovley quadruple loop bow made on my Craft-Dee BowZ bow maker which you will find on my other blog.

Here's a close-up of the larger "slipper".  Hopefully, you can see how fine the glitter is and how it sparkles in a "hushed" way, so to speak.  You'll notice how I left a lot of the black peel-off in place to mimic patent leather.  Click on either image for a close-up.


Well, I hope you'll forgive me for my lapse in time and that you have enjoyed these cards.

Ciao for now!

Ciao Bella!